Training
Beginner MMA Drills: Build Smooth Transitions Before Speed
Use beginner MMA drills to connect stance, striking, takedown entries, clinch control, and ground movement through safe, repeatable practice.
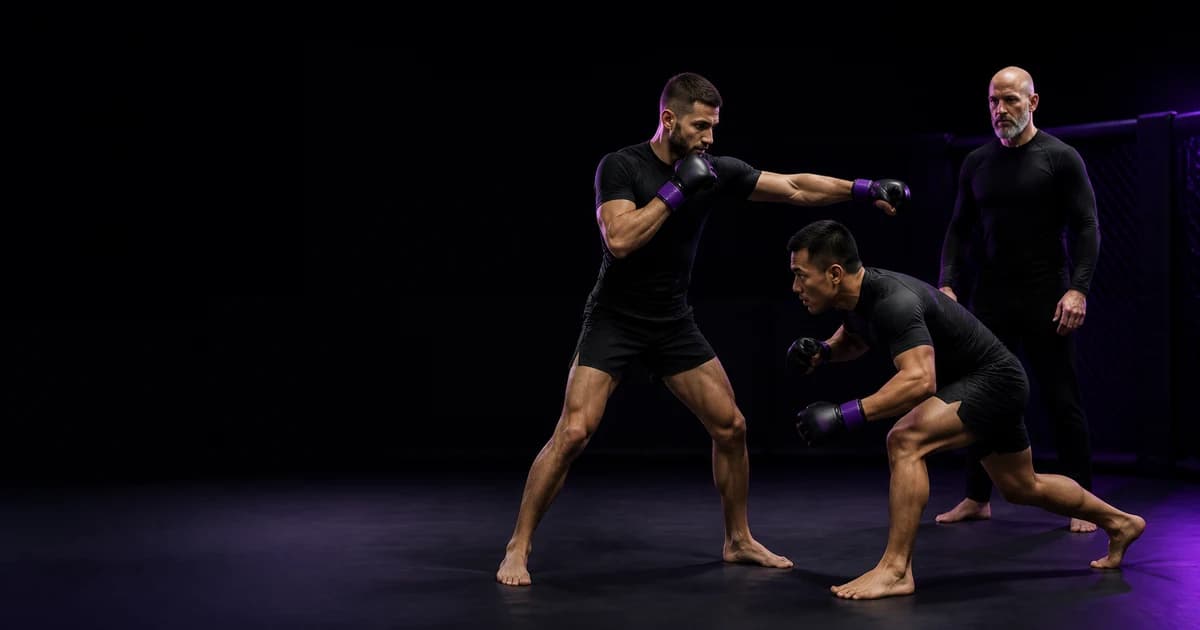
Beginner MMA drills should teach you to connect positions before you add speed, fatigue, or heavy resistance. Start from a stable stance, use a credible striking setup, enter under control, establish a clinch or takedown position, and finish in a posture you recognize. Practise each connection with a qualified coach, a suitable surface, and a partner who understands the drill’s contact and resistance limits.
Mixed martial arts combines striking and grappling, but simply placing techniques beside one another does not create a reliable sequence. You need to preserve balance, distance, posture, and defensive responsibility while moving from one phase to the next. That is why a slow jab-to-entry drill can help a beginner more than a fast combination that ends in a poor position.
Build every drill around a visible connection
A useful beginner drill has three parts:
- A clear starting position
- One transition to solve
- A stable finishing position
For example, “jab, level change, and stop in entry position” is easier to review than “throw a combination and take your partner down.” The first drill gives you defined checkpoints. The second contains too many variables for a beginner to identify what failed.
Use this compact table to select your first drills:
| Drill | Connection trained | Visible checkpoint | Reduce difficulty when |
|---|---|---|---|
| Step-jab and exit | Stance to striking and back to distance | Feet return to a usable stance | Feet cross or posture rises |
| Jab and level change | Striking to entry preparation | Level changes after the jab without folding at the waist | Head drops or rear heel loses control |
| Jab to outside step | Strike to angle change | Head moves off the original line while stance remains stable | Step becomes a hop or feet narrow |
| Pummel to stable inside position | Clinch hand-fighting to control | Head, hands, hips, and feet work together | Partners begin wrestling beyond the drill |
| Entry to coached finish | Takedown position to ground position | Both partners arrive under control | Finish becomes a throw or uncontrolled fall |
| Hip escape to guard recovery | Defensive ground movement to a known position | Hips create space while frames remain organized | Movement relies on pushing with extended arms |
| Technical stand-up | Ground position to standing | Protective frame and visual awareness remain intact | Hands disappear from defensive position |
| Wall stand-up sequence | Ground defense to standing at the wall | Back, feet, and hands move in a planned order | Partner pressure exceeds the assigned level |
Before combining movements, check your base against the MMA stance guide. A stance does not need to look identical across every athlete, but it must let you move, strike, defend, and change levels without a large reset.
Use an observation, decision, and revision loop
Do not judge a drill only by whether you reached the final position. Review how you got there.
1. Observe one transition
Watch one repetition at normal speed, then replay it slowly. Choose one connection rather than reviewing the entire round.
Ask concrete questions:
- Did the athlete begin from a balanced stance?
- Did the setup change the partner’s guard, posture, attention, or position?
- Did the athlete enter from an appropriate distance?
- Did the head, hands, hips, knees, and feet move in a coordinated order?
- Did the athlete retain a defensive hand or frame during the transition?
- Did both partners finish under control?
- Could the athlete move again without rebuilding the entire stance?
Write what the recording shows. “The rear foot came beside the lead foot during the entry” is an observation. “I panicked” is an interpretation that video alone cannot prove.
2. Make one decision
Choose the smallest useful change.
If the setup looks credible but the entry starts too far away, adjust the starting distance. If the feet cross during the exit, shorten the exit step. If posture collapses during a level change, practise the level change without an entry.
Avoid trying to fix stance width, hand position, timing, penetration depth, and finishing mechanics in the same block. One revision gives you a clearer test.
3. Repeat and compare
Perform three to five controlled repetitions with the revision. Keep the partner’s response and resistance consistent enough to make the comparison useful.
Then ask:
- Did the visible error occur less often?
- Did another part of the sequence become less stable?
- Did the revision work only at a slower speed?
- Can the athlete repeat it on both sides without losing control?
- Is the next step another technical revision, or does the drill need a coach’s direct assessment?
If the connection deteriorates, remove one variable. Shorten the sequence, reduce speed, lower resistance, or return to a static starting position.
The site methodology explains how to separate observable evidence from conclusions that a recording cannot support.
A beginner drill progression for connected MMA
Use these phases as a framework, not as a substitute for coaching. Your coach should decide which takedowns, wall positions, ground movements, and contact levels suit your experience and training environment.
Phase 1: Stance, movement, and reset
Begin with forward, backward, and lateral steps. Add a jab only when you can move without bringing your feet together or crossing them.
Try this sequence:
- Start in stance.
- Step into range.
- Throw one controlled jab.
- Exit at an angle.
- Stop and check your stance.
The stop matters. It exposes whether you finished balanced or used momentum to hide a poor position.
Phase 2: Strike to level change
A level change should follow a credible setup. It should not become a disconnected squat performed several beats after the strike.
Start with no partner:
- Throw a jab.
- Return the hand toward a defensive position.
- Change level while keeping your posture organized.
- Hold the bottom position briefly.
- Return to stance.
Next, use a cooperative partner as a distance reference. Do not drive through the partner. The goal is to arrive at the correct entry distance and posture.
Study the positional details in the takedown entry guide before increasing resistance.
Phase 3: Entry to stable clinch
Once the entry position stays controlled, connect it to a stable clinch checkpoint. Your coach may choose an appropriate body-lock, underhook, or leg-attack position.
Assign both partners exact roles:
- The initiating partner performs the setup and entry.
- The receiving partner gives a predetermined reaction.
- Both stop when the target position appears.
- The coach checks head position, hand placement, hip distance, and foot position.
Do not turn the pause into free wrestling. If either partner keeps scrambling after the checkpoint, the drill no longer tests the planned connection.
Phase 4: Coached finish to ground position
Add a finish only under qualified supervision. Use suitable mats, agree on the direction and intensity, and confirm that the receiving partner knows how to land safely.
The finish is successful when both athletes arrive under control in the assigned position. A hard impact does not make the technique more correct.
Pause after landing. Check whether the top athlete has a stable base and whether the bottom athlete can use an appropriate defensive structure. Do not add ground strikes, neck pressure, joint locks, or improvised submissions to a beginner transition drill.
Phase 5: Ground recovery to standing
MMA transitions also move from the ground back to standing. Practise hip escapes, guard recovery, wall movement, and technical stand-ups as separate coached skills before combining them.
During a technical stand-up, review whether you:
- Maintain a protective hand or frame
- Keep visual awareness toward the partner
- Create enough space before bringing the leg underneath you
- Finish in a stance that permits immediate movement
- Avoid turning your back during the transition
Worked example: repairing a jab-to-entry drill
Suppose a beginner records five cooperative jab-to-entry repetitions. In four repetitions, the athlete throws a jab from outside effective range, leans forward, and takes a long reaching step toward the partner.
Observation
The recording shows:
- The jab finishes short of the partner’s guard.
- The head moves forward of the hips before the level change.
- The rear foot trails far behind during the entry.
- The athlete needs an extra step to reach the assigned position.
The recording does not establish:
- Whether the athlete felt afraid of contact
- Whether the partner appeared unusually fast in person
- How much resistance the athlete expected
- Whether fatigue, confusion, or discomfort caused the reaching step
- Whether an off-camera instruction changed the repetition
Decision
Do not add speed. Change the starting distance and shorten the task.
Place the athlete where the jab can credibly reach the partner’s guard without leaning. Perform only the jab and level change. Stop before the penetration step.
Revision
Record five more repetitions with these checkpoints:
- Jab reaches the agreed target.
- Head remains organized over the base.
- Level change begins without an extra shuffle.
- Hands return to their assigned positions.
- Athlete can pause without falling forward.
If those checkpoints improve, add one controlled entry step. If they do not, ask the coach to assess the stance, distance, and movement pattern directly.
After you have completed a coached block, record one transition and use MMA AI: Cage Coach to review the training video for technique feedback. Choose one visible checkpoint from that review and test it during your next supervised drill block. The app can also log striking, wrestling, grappling, strength, and conditioning sessions, while its planning features, competition countdown, structured MMA plans, coached session blocks, and focused drills can help you organize the work around your coach’s program.
Add difficulty one variable at a time
Beginners often increase several demands together. They move faster, add resistance, extend the sequence, and continue until tired. When the drill breaks, they cannot identify the cause.
Use this order:
- Repeat the movement cooperatively.
- Add a predictable partner response.
- Add a choice between two known responses.
- Increase resistance within a coached limit.
- Increase speed without changing the resistance.
- Extend the sequence by one transition.
- Introduce mild fatigue only when technique remains controlled.
You do not need to follow every step in one session. Your coach may change the order based on the technique and your experience.
For longer combinations between striking and wrestling, use the striking-to-takedown transition guide. Keep beginner sparring separate from technical drilling until your coach has defined the rules, goals, and contact level. The beginner sparring strategy guide provides a framework for that discussion.
Film drills so the recording answers a question
A useful recording shows the transition clearly. It does not need dramatic editing.
Before filming:
- Ask your coach and training partner for permission.
- Keep uninvolved people out of frame when possible.
- Place the camera outside the active training area.
- Make sure no one can collide with the phone or tripod.
- Capture the whole body of both athletes.
- Keep the floor and relevant wall position visible.
- Use enough light to distinguish hands, feet, and posture.
- Record several short repetitions instead of one long, crowded session.
A diagonal view often shows stance width, level change, distance, and posture better than a tight front view. For wall work, place the camera where the athletes do not block the relevant hand and hip positions.
Review at normal speed first. Slow motion can reveal movement order, but it can distort your perception of rhythm and reaction time. Use it to inspect a specific checkpoint, not to claim that you know what either athlete intended.
Know what video can and cannot establish
A recording can show visible evidence such as:
- Foot placement
- Stance width
- Hand position
- Posture
- Movement order
- Approximate distance
- Contact location
- Whether a partner gave an obvious visible reaction
- Whether the sequence ended in the assigned position
A recording cannot reliably establish:
- Internal effort or fear
- The athlete’s tactical intent unless stated
- Exact resistance applied through grips or body pressure
- Fatigue without supporting context
- Pain, injury, or medical status
- Instructions delivered off camera
- What an athlete could see outside the frame
- Whether a movement felt stable
- Whether a technique would work against a different reaction
Ask the athlete and coach about sensations, resistance, and intent. Treat pain as a stop signal, not as a technique-analysis problem. Stop training and seek appropriate medical guidance when pain, suspected injury, dizziness, loss of consciousness, breathing difficulty, or neurological symptoms occur.
Common errors in beginner MMA drills
Rushing the setup
A fast entry cannot repair an unconvincing strike or poor distance. Slow the sequence and make the setup reach its intended target.
Treating every repetition as a contest
When the receiving partner changes reactions or resistance without agreement, the drill stops producing comparable evidence. Define the response before starting.
Finishing in an unusable stance
Do not evaluate only the strike, entry, or takedown. Check whether you can defend or move after the transition.
Adding contact to create realism
Contact and resistance require coaching, protective equipment, suitable rules, and partner consent. More contact does not automatically produce a better learning task.
Reviewing too many errors
Choose one visible checkpoint for each block. Save other observations for later rather than changing the whole movement at once.
Guessing from sensations
“The entry felt slow” may be useful personal context, but it is not visible proof. Pair the sensation with observable details such as an extra step, a delayed level change, or a pause before contact.
Training through pain
Do not use video to diagnose pain or decide that an injury is minor. Stop the drill and consult an appropriate qualified professional.
Final beginner MMA drill checklist
Before the session:
- Confirm the drill, roles, resistance, speed, and stopping point.
- Check the surface, space, equipment, and camera position.
- Choose one transition and one visible checkpoint.
- Ask your coach and partner for filming permission.
- Remove uncontrolled throws, submissions, and contact from unsupervised work.
During the drill:
- Begin from a recognizable position.
- Use a credible setup.
- Preserve balance and defensive responsibility.
- Stop at the assigned checkpoint.
- Increase only one difficulty variable at a time.
- Stop immediately for pain, injury concerns, dizziness, or unsafe contact.
After the drill:
- Watch one repetition at normal speed.
- Separate visible evidence from sensation, intent, fatigue, and resistance.
- Select one small revision.
- Record several comparable repetitions.
- Ask a qualified coach to assess anything unclear or unsafe.
- Log what you practised and carry one checkpoint into the next session.